Why Visit Sequoia National Park
Sequoia National Park is a natural treasure, home to some of the most awe-inspiring landscapes in the United States. Towering giant sequoias, including the world-famous General Sherman Tree, dominate the scenery, evoking a sense of wonder and timelessness. The park offers a unique mix of attractions, from pristine meadows to rugged mountain peaks, making it a haven for outdoor enthusiasts, families, and nature lovers alike.
Whether you’re hiking through lush forests, marveling at the park’s massive trees, or stargazing under some of the darkest skies in California, every moment in Sequoia National Park is unforgettable.
Importance of Planning Your Visit
The park spans over 400,000 acres, with diverse ecosystems ranging from low-elevation foothills to the towering High Sierra peaks. Its vastness can be overwhelming, and careful planning is essential to ensure you don’t miss the highlights. Knowing the best times to visit, must-see spots, and practical travel tips will help you make the most of your adventure.
What This Guide Covers
This guide provides a comprehensive look at Sequoia National Park, including its rich history, iconic attractions, thrilling activities, and essential tips for visitors. Whether you’re planning a weekend getaway or an extended trip, you’ll find everything you need to know to explore this incredible destination.
Section 1: Overview of Sequoia National Park
Brief History
Sequoia National Park, established in 1890, was the second national park in the United States and the first created to protect a living organism: the giant sequoia. These ancient trees can live for over 3,000 years, and the park was established to preserve their unique ecosystem from logging and other threats.
Today, the park is part of the larger Sequoia and Kings Canyon National Parks complex, which together offer a breathtaking blend of natural beauty and biodiversity.
Key Features
- Giant Forest: The heart of the park and home to the largest sequoias, including the General Sherman Tree.
- High Sierra Wilderness: A rugged, mountainous region with stunning alpine lakes and dramatic vistas, perfect for experienced hikers and backpackers.
- Foothills Region: Known for its wildflower blooms in spring and diverse wildlife, including black bears and mule deer.
Best Time to Visit
- Spring and Summer (March to August): Ideal for hiking, exploring the giant sequoias, and accessing high-altitude areas. Spring also brings vibrant wildflowers to the foothills.
- Fall and Winter (September to February): Fall offers fewer crowds and stunning foliage, while winter transforms the park into a snowy wonderland, perfect for snowshoeing and cross-country skiing.
Section 2: Must-See Attractions in Sequoia National Park
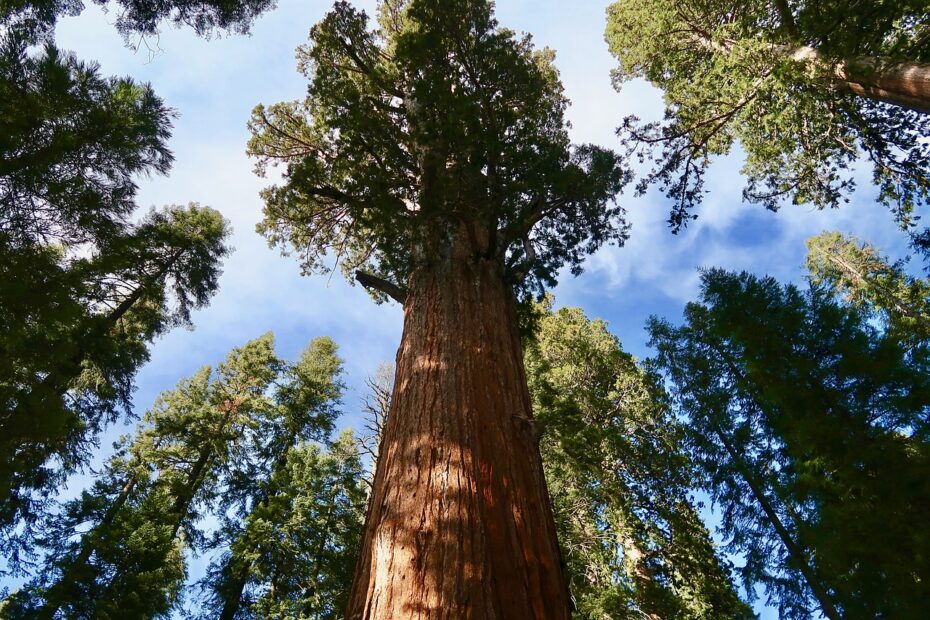
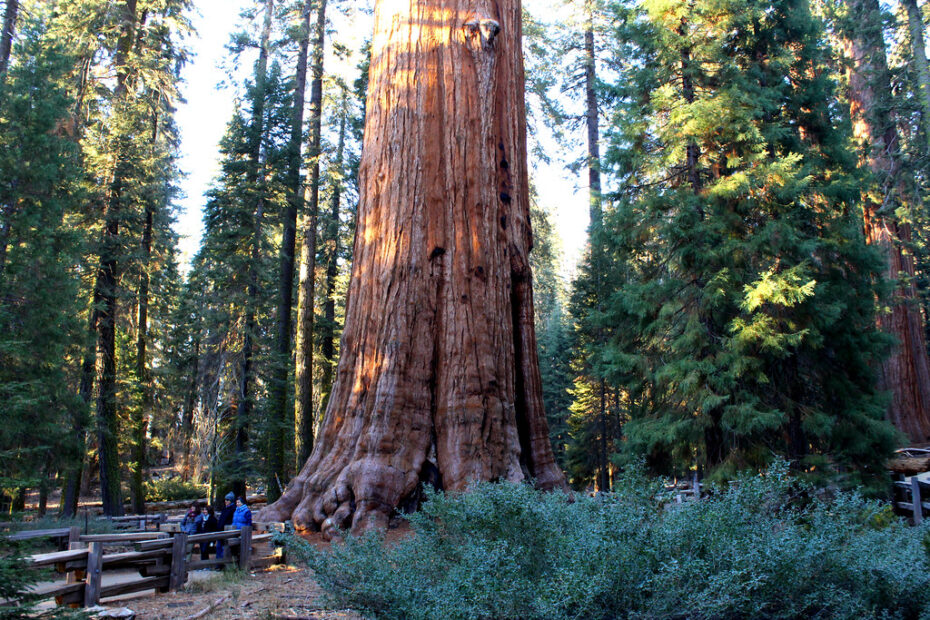
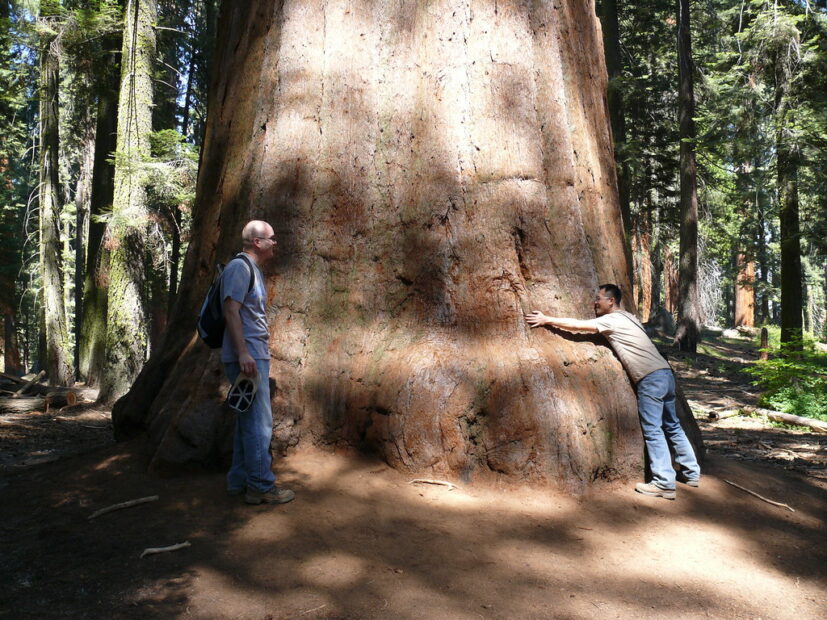
General Sherman Tree
The General Sherman Tree is a natural marvel and the largest living tree on Earth by volume. Towering at 275 feet with a massive base diameter of 36 feet, this iconic sequoia is a testament to the grandeur of nature. The tree’s size can’t be fully captured in photographs; standing at its base, you’ll feel dwarfed by its sheer immensity.
- Tips for Visiting:
The General Sherman Tree is one of the park’s most visited attractions, so it’s wise to plan your visit strategically. The main parking lot is about half a mile from the tree, with a well-paved trail leading to its base. Arrive early in the morning or late in the afternoon to avoid peak crowds, particularly during summer. Winter visitors should check road conditions, as snow can impact accessibility. - Nearby Trails:
For a more immersive experience, explore the Congress Trail, a 2-mile loop starting near the General Sherman Tree. This peaceful trail winds through the Giant Forest and introduces you to other colossal sequoias, including the Senate and the House Group, clusters of trees named for their resemblance to a governing body.
Moro Rock
Moro Rock is a striking granite dome that provides one of the park’s most breathtaking viewpoints. The short but steep climb involves 350 steps carved into the rock, leading to a summit with panoramic views of the Sierra Nevada Mountains, the Kaweah River Canyon, and the Great Western Divide. On clear days, the vistas stretch for miles, offering a perspective that few other spots in the park can match.
- Safety Tips:
The ascent is not for the faint of heart. While the steps are stable, the climb can feel challenging due to its elevation and the narrow pathways near the summit. Wear sturdy hiking shoes for better grip, and take breaks if needed. Be extra cautious during wet or icy conditions, as the steps can become slippery. - Best Times to Visit:
Sunrise and sunset are magical times to visit Moro Rock, as the soft light enhances the surrounding landscapes and offers incredible photo opportunities.
Tunnel Log
The Tunnel Log is one of Sequoia National Park’s quirkiest landmarks. Created from a fallen sequoia in 1937, the tunnel was carved to allow cars to pass through its massive trunk. Measuring 17 feet wide and 8 feet high, it’s a playful reminder of the park’s rich history and human interaction with its natural wonders.
- Nearby Attractions:
After snapping a photo at the Tunnel Log, head over to Crescent Meadow, a tranquil area often called the “gem of the Sierra.” This meadow is surrounded by towering trees and offers serene walking trails that feel like stepping into a fairytale. Keep an eye out for wildlife like deer and marmots, which are common in this area.
Crystal Cave
For a completely different perspective of Sequoia National Park, venture underground to explore the wonders of Crystal Cave. This marble cavern is adorned with stunning stalactites, stalagmites, and shimmering rock formations, illuminated by guided tour lights. The cave’s cool, damp atmosphere contrasts sharply with the sunlit forests above, creating a unique and memorable experience.
- Booking Tips:
Crystal Cave tours are offered seasonally, typically from May to September. Tickets must be purchased in advance at the visitor centers or online, as they often sell out during peak seasons. Be prepared for a short but steep hike to the cave entrance. - What to Bring:
Wear sturdy shoes with good grip, as the cave floors can be slippery. Bring a jacket, as temperatures inside the cave remain cool year-round (around 50°F).
Section 3: Best Activities in Sequoia National Park
Hiking Trails
Sequoia National Park offers a diverse array of trails, from easy loops through lush meadows to challenging multi-day treks across alpine terrain. Hiking is one of the best ways to experience the park’s varied ecosystems, towering trees, and stunning vistas.
Easy Trails
- Big Trees Trail:
This 1.2-mile loop circles Round Meadow, providing a gentle walk that’s perfect for families or those looking for a leisurely pace. Along the way, interpretive signs explain the ecology and history of the giant sequoias, making it an educational experience. - Crescent Meadow Loop:
A 1.6-mile trail through the picturesque Crescent Meadow, often called the “gem of the Sierra.” The trail offers opportunities to spot deer, marmots, and birds while soaking in the serene beauty of the surrounding forest.
Moderate Trails
- Tokopah Falls Trail:
This 4-mile round trip follows the Marble Fork of the Kaweah River to a stunning 1,200-foot waterfall. The trail is dotted with wildflowers in spring and offers incredible views of granite cliffs along the way. - Congress Trail:
Starting near the General Sherman Tree, this 2-mile loop provides a quieter alternative to busier areas, taking you past notable sequoias like the President and the McKinley Tree.
Challenging Trails
- High Sierra Trail:
Spanning 72 miles from Crescent Meadow to Mount Whitney, this multi-day trek is a bucket-list adventure for experienced hikers. The trail offers dramatic alpine scenery, pristine lakes, and a chance to experience the park’s wilderness. - Mount Whitney Trail:
This challenging ascent to the highest peak in the contiguous United States (14,505 feet) is not for the faint-hearted. Permits are required, and preparation is essential for this strenuous but rewarding journey.
Wildlife Watching
Sequoia National Park is a haven for wildlife, offering sightings of black bears, mule deer, bobcats, and an array of bird species. Whether you’re hiking or relaxing at a campground, you’re likely to encounter some of the park’s diverse inhabitants.
- Tips for Safe Encounters:
- Maintain Distance: Keep at least 100 yards from bears and 25 yards from other wildlife.
- Food Storage: Use bear-proof containers provided at campsites to avoid attracting animals.
- No Feeding: Feeding wildlife is prohibited, as it disrupts their natural behaviors and can create dangerous situations.
Birdwatchers will enjoy spotting species like Steller’s jays, woodpeckers, and mountain bluebirds. Bring binoculars for a closer look at these feathered residents.
Stargazing
Sequoia National Park’s remote location and minimal light pollution make it a prime destination for stargazing. The night sky here is a breathtaking display of constellations, shooting stars, and the Milky Way.
- Best Spots:
- Big Trees Trail: The meadow’s open space is perfect for laying out a blanket and enjoying the stars.
- Wolverton Meadow: Another excellent stargazing spot, with easy access and plenty of space to set up for the evening.
- Best Times:
Summer and early fall are ideal for stargazing, with clear skies and warm nights.
Camping and Lodging
Staying overnight in the park is one of the best ways to immerse yourself in its natural beauty.
- Camping Options:
- Lodgepole Campground: Centrally located, this campground offers proximity to the Giant Forest and popular trails. Facilities include flush toilets and a nearby market.
- Dorst Creek Campground: A family-friendly site with spacious campsites and easy access to hiking trails.
- Lodging Options:
For those seeking more comfort, the Wuksachi Lodge offers rustic yet cozy accommodations within the park. With its convenient location and on-site dining, it’s an excellent choice for families and couples.
Section 4: Practical Tips for Visiting Sequoia National Park
Getting There
- Nearest Airports: Fresno Yosemite International Airport (FAT) is the closest major airport, about 1.5 hours away.
- Driving Directions: From Los Angeles, the park is about 4 hours north via CA-198.
Shuttle Options
During the busy season, free shuttles operate within the park, making it easy to access major attractions without worrying about parking.
Entrance Fees and Passes
- Entrance Fee: $35 per vehicle, valid for 7 days.
- Annual Pass: The America the Beautiful Pass ($80) covers all U.S. national parks for a year.
What to Pack
- Essentials for Hiking: Comfortable shoes, a reusable water bottle, sunscreen, and a first-aid kit.
- Cold-Weather Gear: Layers, gloves, and a hat for winter visits.
Safety Considerations
- Bear Safety: Always store food in bear-proof lockers provided at campsites.
- Weather Preparedness: Temperatures can vary greatly; check the forecast and dress accordingly.
- Trail Etiquette: Yield to uphill hikers and stay on marked paths to preserve the ecosystem.
Accessibility
The park offers wheelchair-accessible trails, such as the Big Trees Trail, and facilities like restrooms and visitor centers designed for all visitors.
FAQs
How much time do you need to explore Sequoia National Park?
A weekend is enough to see major attractions like the General Sherman Tree and Moro Rock. For a more in-depth experience, 3–4 days allow time for hiking and exploring nearby Kings Canyon.
Can you visit both Sequoia and Kings Canyon National Parks on one trip?
Yes, the parks are adjacent and connected by the scenic Generals Highway, making it easy to explore both.
What is the best time to see the giant sequoias?
The giant sequoias are accessible year-round, but spring and summer offer easier trail access and warmer weather.
Are pets allowed in Sequoia National Park?
Pets are allowed in parking areas and on paved roads but not on trails or in wilderness areas.
Conclusion
Sequoia National Park offers an unparalleled blend of natural wonders, from the awe-inspiring giant sequoias to the rugged beauty of the High Sierra. Its iconic attractions, thrilling activities, and serene atmosphere make it a must-visit destination.
Whether you’re marveling at the General Sherman Tree, hiking to Tokopah Falls, or stargazing in the Giant Forest, every moment spent here is an opportunity to connect with nature. Ready to experience the magic of Sequoia National Park? Start planning your trip today and prepare for an unforgettable adventure in one of America’s most treasured landscapes.